
How to Clean and Maintain Your PC: A Comprehensive Guide
Maintaining your PC is essential to ensure its longevity and peak performance. Dust buildup, overheating, and failing components can all slow your system down and cause irreversible damage if left unchecked. In this blog post, we’ll walk through the signs that it’s time to clean your custom PC, how to do it properly, and the ongoing maintenance that will keep your machine running smoothly for years.
When Should You Clean Your PC?
Regular cleaning is crucial to maintaining the efficiency and lifespan of your PC. The most common signs that your PC needs a cleaning are:
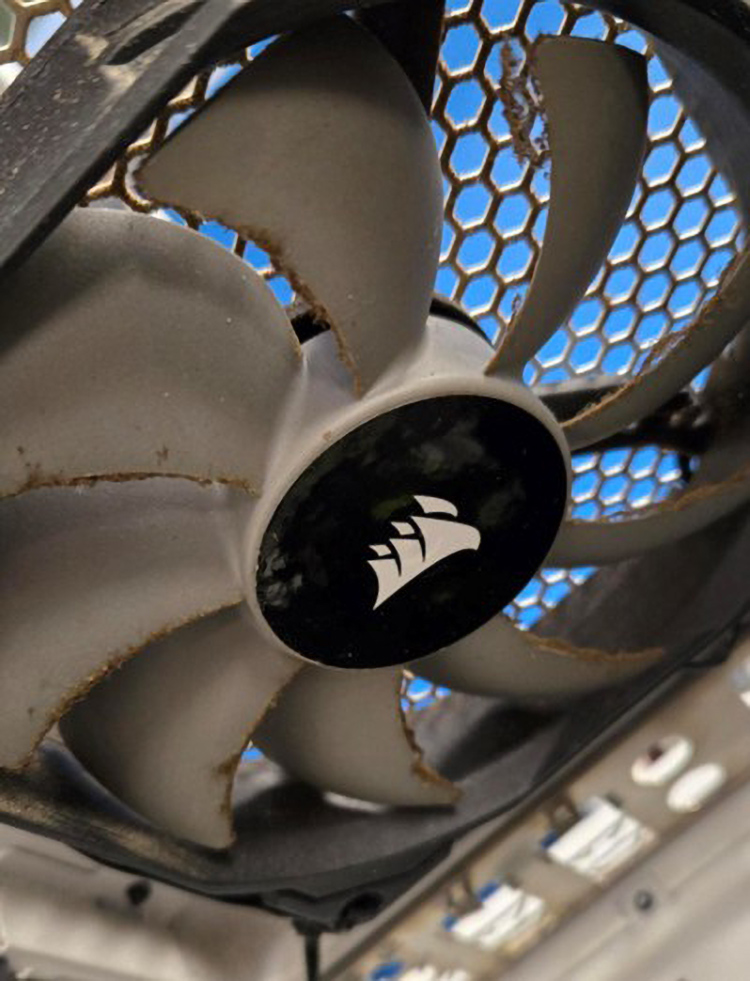
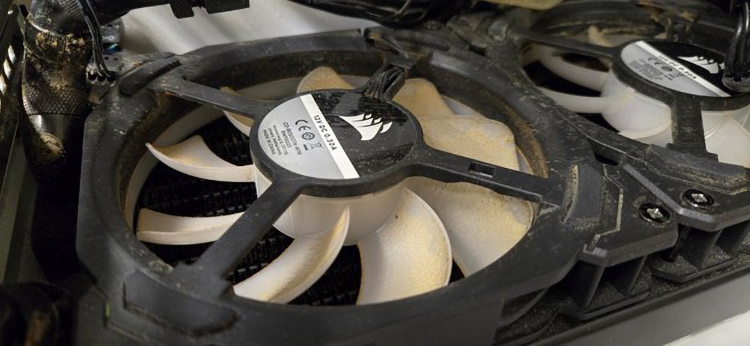
- Visible Dust: If you notice dust building up inside your case, especially on key components like the fans, CPU heatsinks, or GPU, it’s time to clean your PC. Dust can clog fans, obstruct airflow, and reduce the cooling efficiency of your hardware.
- Higher Than Usual Temperatures: If you see your PC’s temperatures rising unusually high, even during light tasks, dust buildup could be the culprit. Monitoring software like HWMonitor or MSI Afterburner can help you track the temperature of your CPU, GPU, and other critical components. If temperatures are spiking, dust could be impeding airflow or heat dissipation.
Environmental Factors: Keep in mind that the frequency of cleaning may depend on your environment. If you have pets, smoke indoors, or live in a particularly dusty area, your PC will likely need cleaning more often.
How to Clean Your PC
Cleaning your gaming PC, workstation, or desktop computer can seem intimidating, but it’s a simple task when done right. Here’s a step-by-step guide to effectively clean your system:
1. Turn Off and Unplug the PC
Before doing anything, ensure your PC is completely powered off and the power supply turned off. We won’t be doing anything that could shock us, but it’s helpful for the fans to be still while dusting, and generally good practice to leave the system off when doing any internal work. Bonus points if you leave the power supply plugged in when its off, so you can hold down the computer’s power button to discharge the capacitors!
2. Use Compressed Air
The most common method for cleaning a PC is using canned air. This allows you to blow dust out of the internal components without physically touching them, reducing the risk of damaging sensitive parts.
- Target Dust-Heavy Areas: Focus on the fans (CPU, GPU, case fans), heat sinks, power supply unit (PSU), and vents. These areas tend to collect the most dust.
- Do Not Hold the Can Too Close: Keep the nozzle about 2-4 inches from the components to maximize the area we hit.
- Don’t Let the Fans Move When Spraying: While it’s a lot of fun to blast the fans and watch them spin, this is generally not a good thing for them to do, so make sure to hold them still.
- Spray in Short Bursts: Don’t continuously spray, as this will cool down the can, and limit the power of the blast. Short bursts will do the job, and let your hand warm the can back up.
3. Consider an ESD-Safe Vacuum
If you’re looking for an alternative to canned air, an ESD-safe vacuum is an excellent option for removing dust. These vacuums are specifically designed to avoid creating static electricity, which could harm your sensitive components. An ESD-safe vacuum also gives you the ability to suck up the dust from more intricate areas like between heatsink fins or under cables.
4. Pay Special Attention to Heat Sinks and Fans
The most critical areas to focus on are the fans and heatsinks. Over time, dust can accumulate in between the fan blades and the metal fins of the heatsinks or radiators, reducing airflow and cooling efficiency. Cleaning these areas thoroughly can make a significant difference in your PC’s temperature.
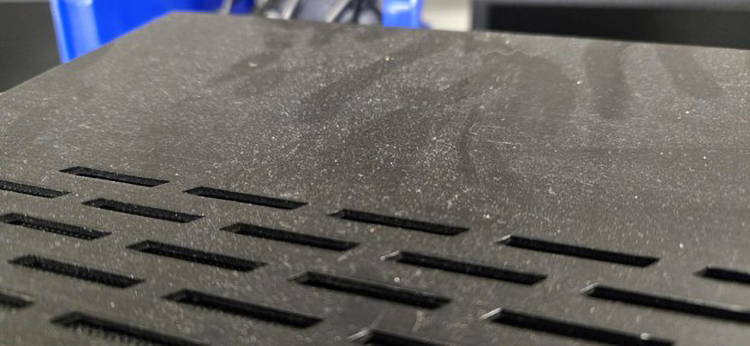
5. Clean Your Case
While cleaning your internal components is essential, don’t forget the exterior of your PC case. Use a microfiber cloth or a soft brush to remove dust from the case’s surface, vents, and front panel. Keeping the case clean also helps prevent additional dust from entering the system, especially if you have dust filters.
Continued Maintenance for a Healthy PC
Cleaning your custom gaming PC goes beyond just blowing away dust. Here are some additional maintenance tasks that will help keep your system in top shape.
1. Check and Replace Thermal Paste
Thermal paste (or thermal compound) plays a crucial role in heat transfer between your CPU/GPU and their heatsinks. Over time, thermal paste can dry out, reducing its efficiency and causing higher temperatures.
If you notice that your PC is still running hot even after cleaning out the dust, it could be time to replace the thermal paste. This is a bit more advanced than simple cleaning, it’s a multistep process, but generally isn’t difficult. If you feel comfortable attempting, here’s a general overview:
- Remove the Heatsink: Gently remove the heatsink from the CPU or GPU. It’s best to take pictures here, to help remember how to assemble something after it’s disassembled. GPUs are considerably more involved than CPUs here!
- Clean the Old Paste: Use isopropyl alcohol (preferably 90% or higher) and a lint-free cloth (coffee filtrers work great in a pinch!) to clean off the old thermal paste from both the chip and the heatsink.
- Apply New Thermal Paste: Apply a small, pea-sized amount of fresh thermal paste in the center of the chip. When the heatsink is reattached, it will spread the paste evenly across the surface.
- Reattach the Heatsink: Carefully place the heatsink back onto the CPU or GPU, securing it firmly. Hopefully you took pictures during disassembly!
This can considerably improve thermal performance with dried out paste!
2. Check Your Fans
While it’s rare for fans to fail completely, it can happen. The most common issues are:
- Fan Motor Failure: The fan stops spinning, which directly impacts airflow.
- Bearing Failure: The fan may still spin but will produce a lot of noise or vibrations, which can reduce airflow efficiency.
If you notice these problems, it’s best to replace the faulty fan. Most PC fans are relatively inexpensive and easy to replace, so don’t hesitate to swap them out if they’re causing issues.
3. Monitor Software
Use hardware monitoring software to keep an eye on your temperatures and fan speeds. This way, you can identify potential overheating problems before they become serious. Software like HWMonitor or MSI Afterburner can provide detailed information on your system’s health, including temperature readings for your CPU, GPU, motherboard, and hard drives.
Conclusion
Cleaning and maintaining your custom PC is crucial to ensuring optimal performance and preventing overheating. Regular dusting, checking fans, reapplying thermal paste, and replacing failing components can keep your system running cool and smooth. By following these steps, you’ll extend the life of your PC and keep it running at its best for years to come.
Remember: An ounce of prevention is worth a pound of cure!


Intel Core Ultra 200S Plus Benchmarks
